mirror of
https://github.com/jackyzha0/quartz.git
synced 2025-12-25 22:04:06 -06:00
228 lines
9.1 KiB
Markdown
228 lines
9.1 KiB
Markdown
---
|
||
title: Design Maestro
|
||
---
|
||
|
||
# What is Design Maestro?
|
||
This is a set of macros for [[Optimization/Tools/Keyboard Maestro]], designed for designers working in [[Optimization/Tools/Figma]] and [[Optimization/Tools/Webflow]] and using the capabilities of [[macOS]].
|
||
|
||

|
||
|
||
It currently contains about 80 macros to speed up work with projects and files, and automate repetitive tasks. ~~Access to the project is currently closed and its release is planned for January / February 2022.
|
||
|
||
## Third place on Product Hunt
|
||
On the third of June 2022, Design Maestro won [the podium at Product Hunt](https://www.producthunt.com/posts/design-maestro), taking third place 🎉
|
||
|
||

|
||
|
||
## Design Maestro FREE
|
||
The project was published at the end of March 2022 as a free version of 10 macros:
|
||
https://designmaestro.io
|
||
|
||
<iframe width="560" height="315" src="https://www.youtube.com/embed/54aEWyfwiu8" title="YouTube video player" frameborder="0" allow="accelerometer; autoplay; clipboard-write; encrypted-media; gyroscope; picture-in-picture" allowfullscreen></iframe>
|
||
|
||
## Design Maestro 1.0
|
||
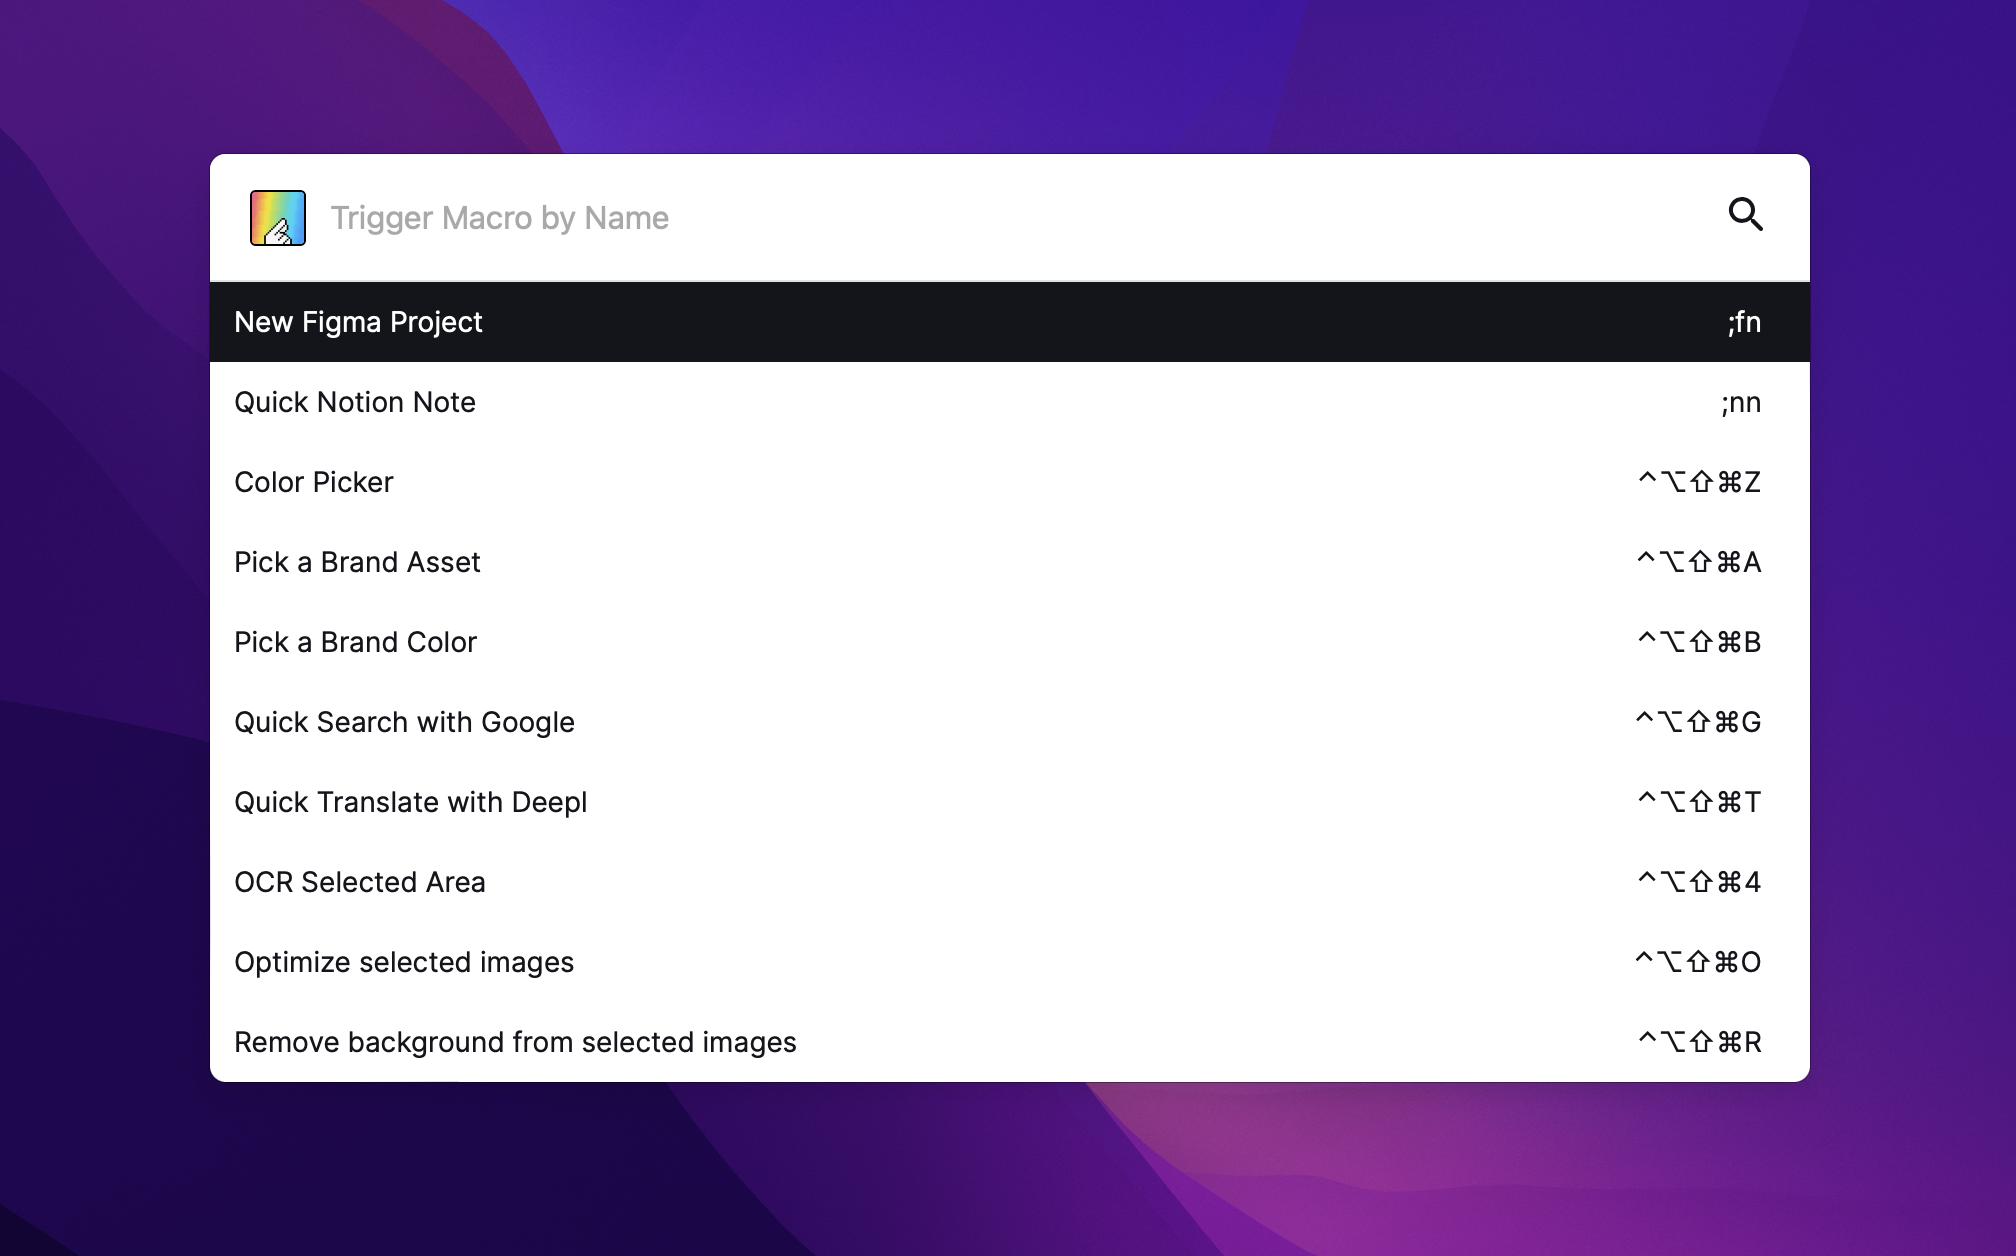
In May 2022, I discovered an action in Keyboard Maestro called , which is intended to allow you to display a dialog box based on your own HTML code. I decided to take advantage of this to create a fully customized interface for Design Maestro, which looks as follows:
|
||
|
||
|
||
|
||
At the moment, the entire interface of the application uses JavaScript / HTML / CSS code, but in my opinion, it is even possible there to use, for example, [[Vue]] or [[Svelte]]. Especially since the whole thing is based on a library of macros, which allow you to create more.
|
||
|
||
Design Maestro offers, among other things:
|
||
- Adding custom assets and colors for quick selection
|
||
- Color Picker usable anywhere in the system
|
||
- Ability to quickly search Google and Deepl
|
||
- Ability to save quick access URLs
|
||
- Ability to create custom snippets (text expander)
|
||
- Optimize selected images
|
||
- Remove background from selected photos
|
||
|
||

|
||
|
||
|
||
README.md repository https://github.com/iceener/designmaestro (currently private).
|
||
|
||
# Introduction
|
||
DesignMaestro is a set of macros of Keyboard Maestro which was build on top of [Custom HTML Prompt Action](https://wiki.keyboardmaestro.com/action/Custom_HTML_Prompt?s[]=prompt&s[]=html#Form_Validation). It was designed so creating a new macros are as easy as it possible by by using JSON objects.
|
||
|
||
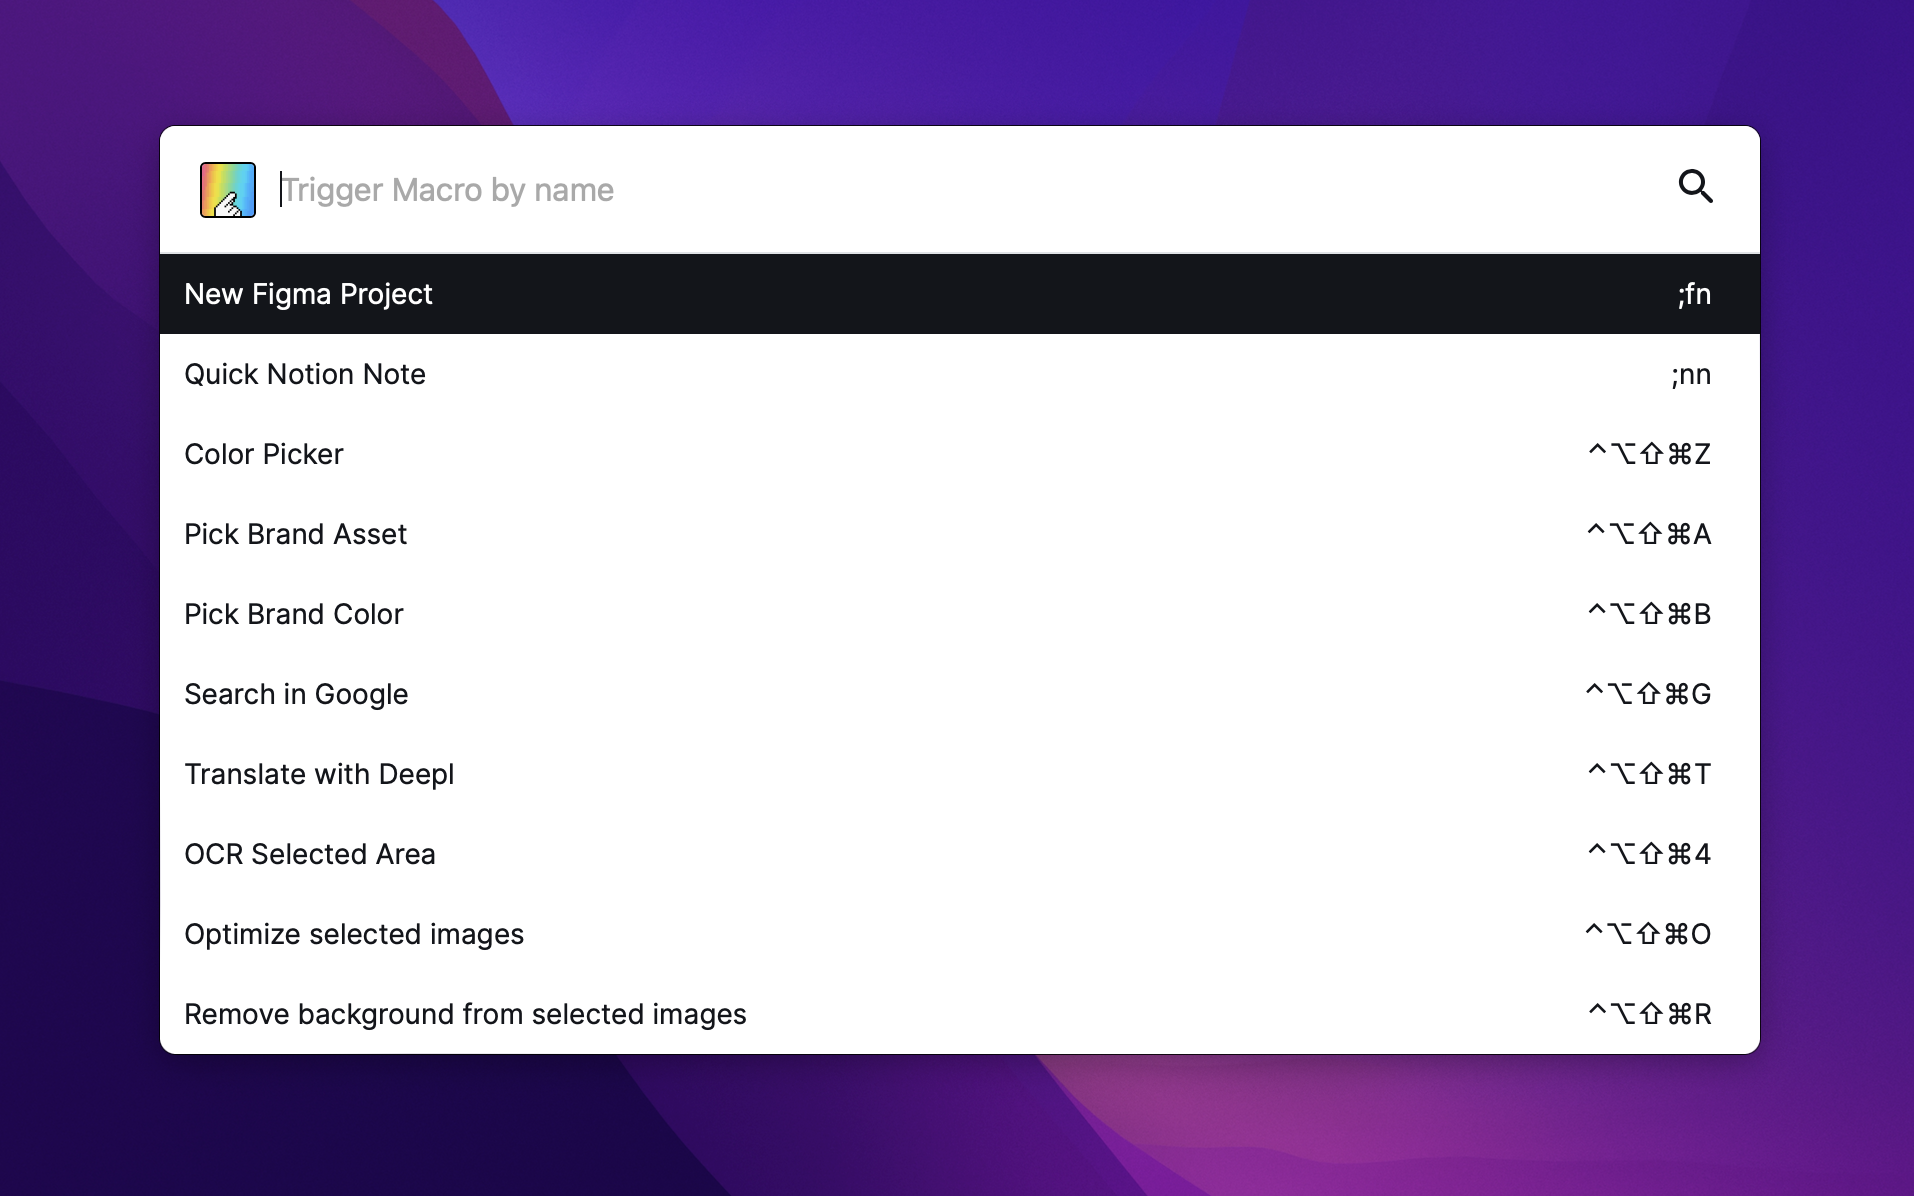
An example prompt looks like this:
|
||
|
||
|
||
|
||
A core of this project is an [Svelte](https://svelte.dev/) application bundled with [Vite.js](https://vitejs.dev/) to a single HTML file which may be loaded from `/dist` directory or by pasting it inline to `Custom HTML Prompt Action`.
|
||
|
||
## Installation
|
||
1. Download this repostiory to your Mac
|
||
2. Go to a directory and run `npm install`
|
||
3. Build project with `npm run build`
|
||
4. Point `index.html` from `dist` directory to `Custom HTML Prompt Action`
|
||
5. After each change make sure you rebuild a project with `npm run build`
|
||
|
||
## Predefined Macros
|
||
We have created a set of predefined, plug&play macros you can use right away. DesignMaestro macros were created with designers in mind to improving their work by saving time on repeatitive tasks.
|
||
|
||
**This includes:**
|
||
- optimizing image file sizes
|
||
- removing backround from selected images
|
||
- saved assets picker
|
||
- saved color picker
|
||
- copy text from selected screen area (with OCR feature)
|
||
- global system picker (copying hex color from pixel which is pointed with a mouse)
|
||
- quick translation & searching
|
||
- quick creating a figma, notion and webflow projects
|
||
- pasting `Lorem ipsum dolor sit amet, consectetur adipiscing elit interdum hendrerit ex vitae sodales.`
|
||
|
||
Those macros are available here for free: https://designmaestro.io.
|
||
(Premium set of packages is on a way)
|
||
|
||
## Create a custom Prompt
|
||
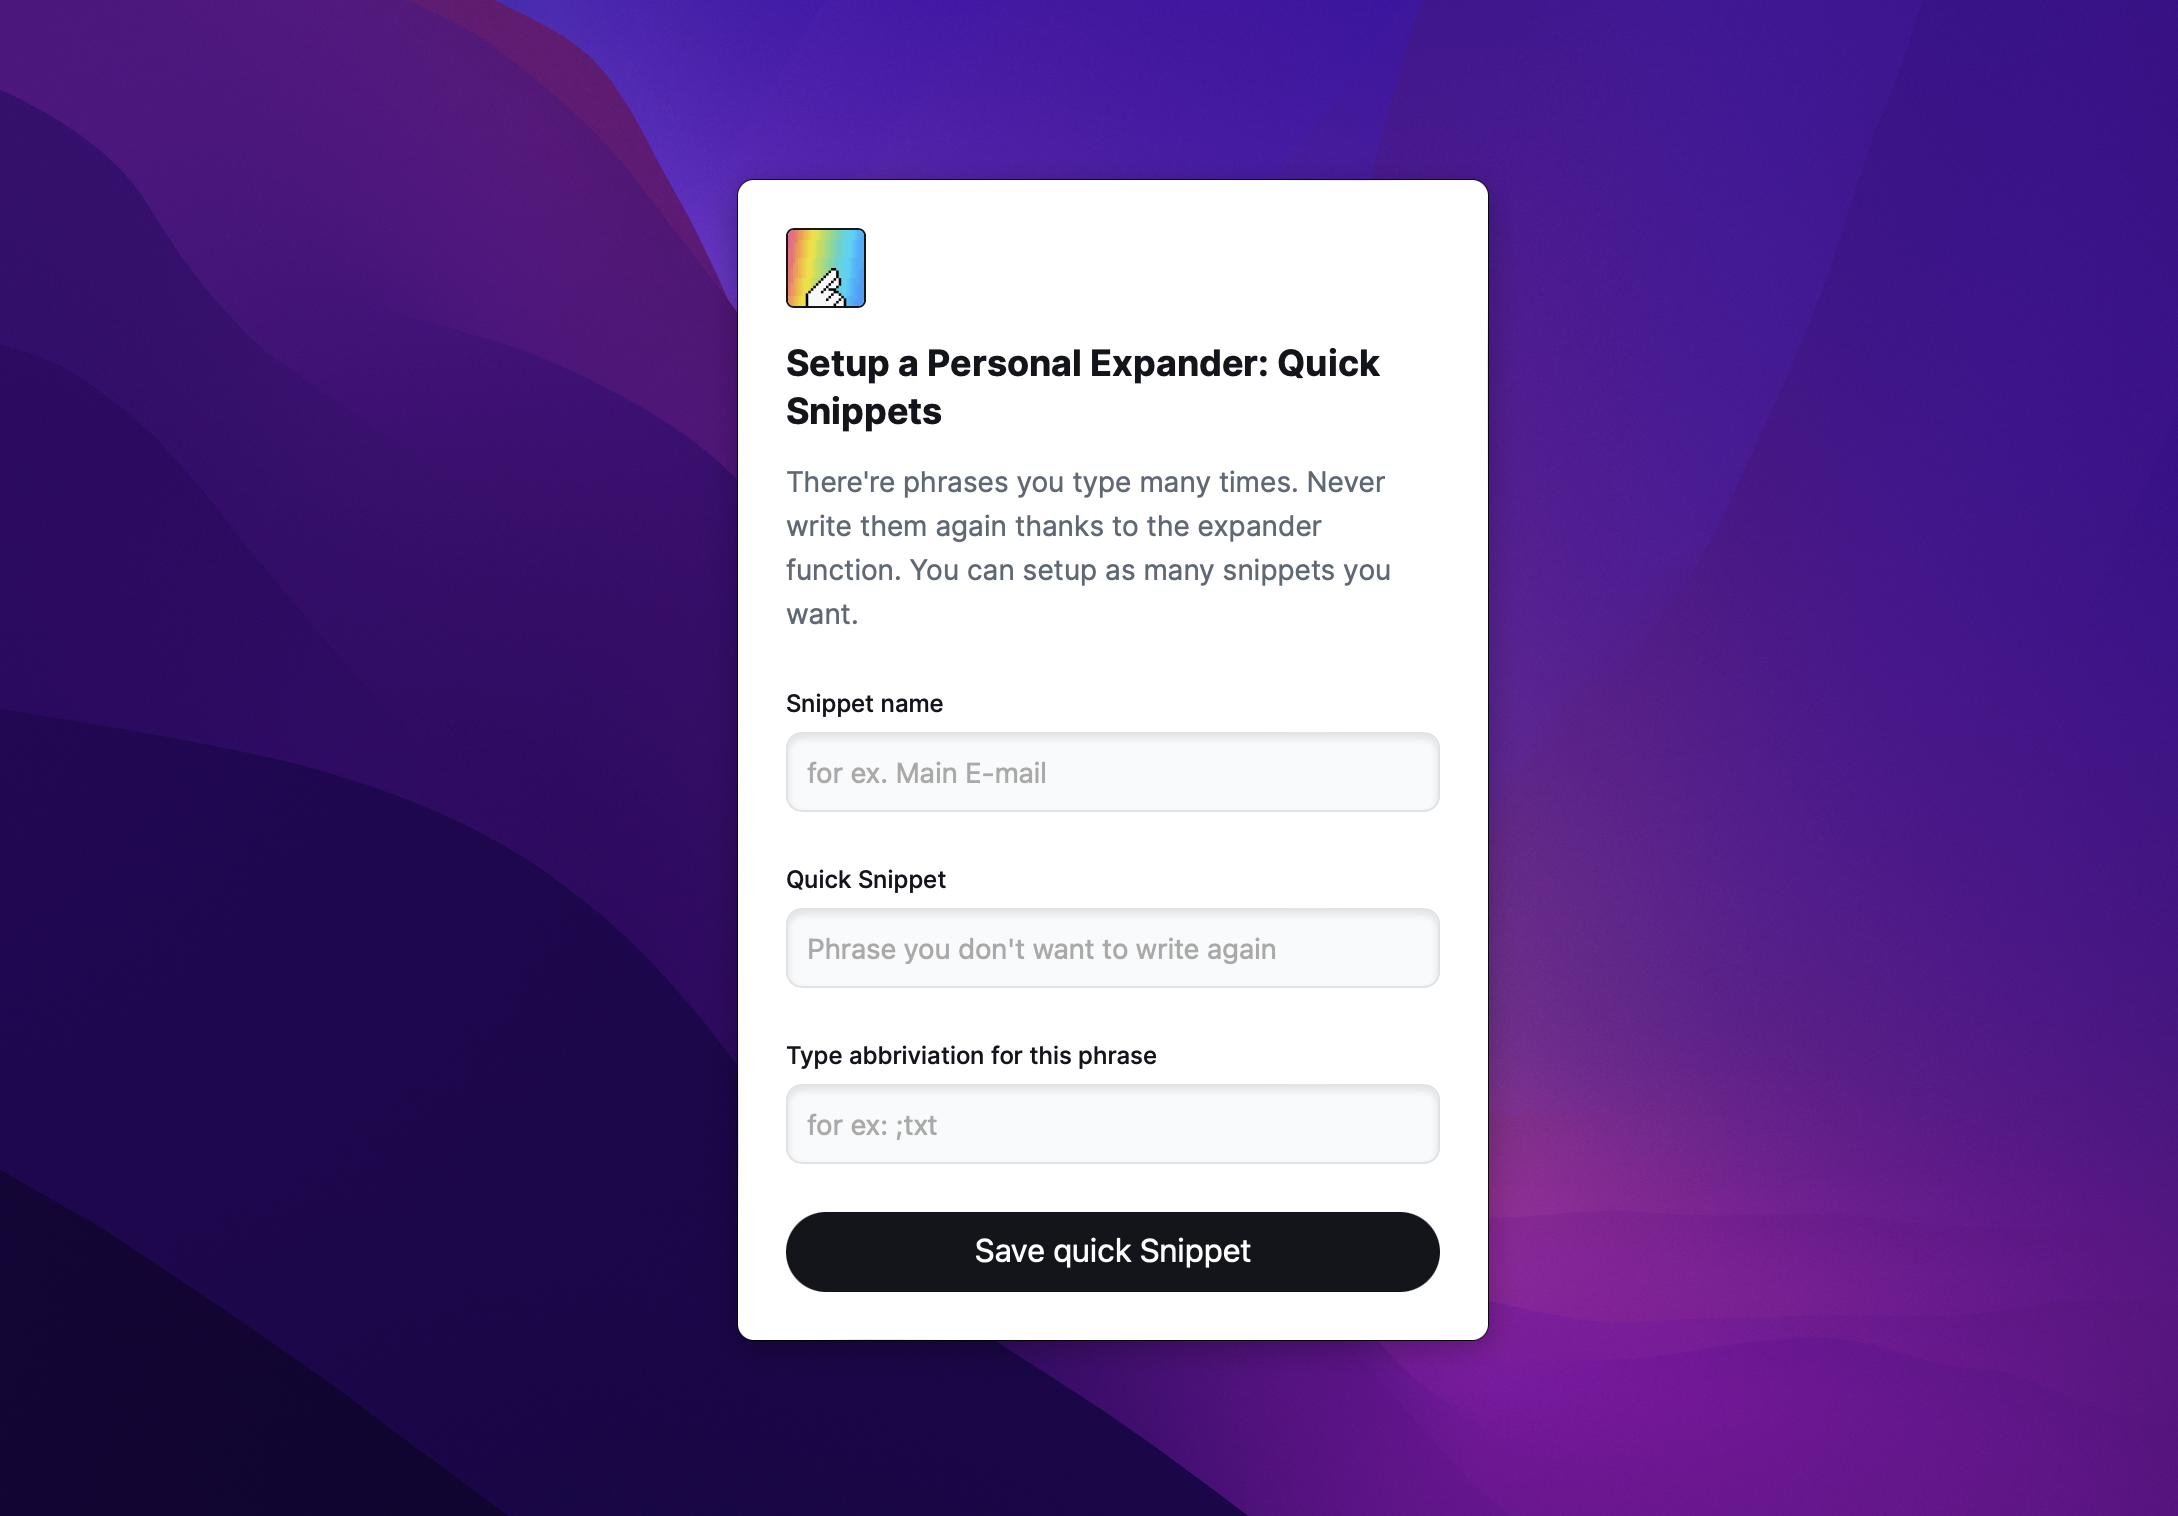
DesignMaestro allows you to create a simple form which contains:
|
||
- a title & description
|
||
- form inputs (text, textarea, select, color, radio, datetime-local)
|
||
- actions buttons (confirm and cancel)
|
||
|
||
An example looks like this:
|
||
|
||
|
||
|
||
In order to generate this prompt like this, basically you have to:
|
||
1. Create a JSON object and save it's stringify version in a `DMLauncher` variable of Keyboard Maestro.
|
||
2. Use `Execute a Macro` action and trigger `(util) Render` macro.
|
||
|
||
All input values will be saved in Keyboard Maestro variables and names of those variables will match inputs `name` field. For example: `<input name="example" />` value will be saved in a variable with a name `example`.
|
||
|
||
| Please note that those variables will be saved only if Prompt will be ended with a confirmation (pressing `Enter` or `Primary button`)
|
||
|
||
**JSON reference both for prompt and lists configuration looks like this:**
|
||
```
|
||
{
|
||
|
||
"type": "prompt", // prompt or list
|
||
|
||
"actionType": "default", // required only for type: "list". default - trigger macro by name | download - downloads a image file and set its content to clipboard | copy - copy a value of list item to a clipboard
|
||
|
||
"header": {
|
||
|
||
"active": true,
|
||
|
||
"title": "", // prompt header
|
||
|
||
"description": "" // prompt description
|
||
|
||
},
|
||
|
||
"actions": { // custom prompt actions
|
||
|
||
"mode": "decision", // decision | confirm. Decision displays boths confirmation & cancel buttons and confirm displays just a confirm button
|
||
|
||
"visible": true, // true | false - with type of list, actions should be set to false
|
||
|
||
"confirmLabel": "Translate", // confirm button label
|
||
|
||
"cancelLabel": "Nevermind" // cancel button label
|
||
|
||
},
|
||
|
||
"inputs": [] // see a reference below. This is required for `type: prompt`
|
||
|
||
"list": [] // see a reference below. This is required for `type: list`
|
||
|
||
}
|
||
```
|
||
|
||
**JSON reference for inputs looks like this:**
|
||
|
||
As you can see it's an array of objects describing each input field.
|
||
|
||
```json
|
||
[
|
||
|
||
{ // TEXT / TEXTAREA / DATE INPUT FIELD
|
||
|
||
"type": "text", // text | textarea | datetime-local
|
||
|
||
"name": "textVar", // value of this input is connected with KM variable with this name
|
||
|
||
"label": "This is a text field", // input label
|
||
|
||
"value": "default value", // it can be set right here or by setting a KM Variable with a name coresponding to this input name.
|
||
|
||
"placeholder": "Type something", // input placeholder
|
||
|
||
"focused": true, // autofocus. Make sure to have a single one for each prompt
|
||
|
||
"rows": 8 // for textarea only! Default: 8
|
||
|
||
},
|
||
|
||
{ // COLOR picker input
|
||
|
||
"type": "color",
|
||
|
||
"name": "colorVar", // value of this input is connected with KM variable with this name.
|
||
|
||
"value": "#ffffff", // it can be set right here or by setting a KM Variable with a name coresponding to this input name.
|
||
|
||
"label": "Quick Snippet", // input label
|
||
|
||
},
|
||
|
||
{ // SELECT input
|
||
|
||
"type": "select",
|
||
|
||
"name": "selectVar", // value of this input is connected with KM variable with this name.
|
||
|
||
"label": "Select something", // input label
|
||
|
||
"placeholder": "Choose", // input placeholder
|
||
|
||
"value": "en/pl", // default value
|
||
|
||
"focused": true, // autofocus. Make sure to have a single one for each prompt
|
||
|
||
"options": [ // An array of options
|
||
{
|
||
"label":"Label", // Option label
|
||
"value": "option1", // Option value
|
||
"selected": true // true / false is selected
|
||
}
|
||
]
|
||
}
|
||
]
|
||
```
|
||
|
||
**JSON reference for list items looks like this:**
|
||
|
||
As you can see it's an array of objects describing each list item.
|
||
|
||
```
|
||
[
|
||
{
|
||
"label": "", // list item main label
|
||
"value": "", // value of an item. May be: a macro name to trigger, value to be copied to clipboard or an image file needed to be downloaded and copied to clipboard
|
||
"description":"" // description of an item, is showing on a right side
|
||
"thumbnail": "" // (optional) url to a thumbnail (must be public and point to the image file)
|
||
}
|
||
]
|
||
```
|
||
|
||
## Confirm & Cancel actions
|
||
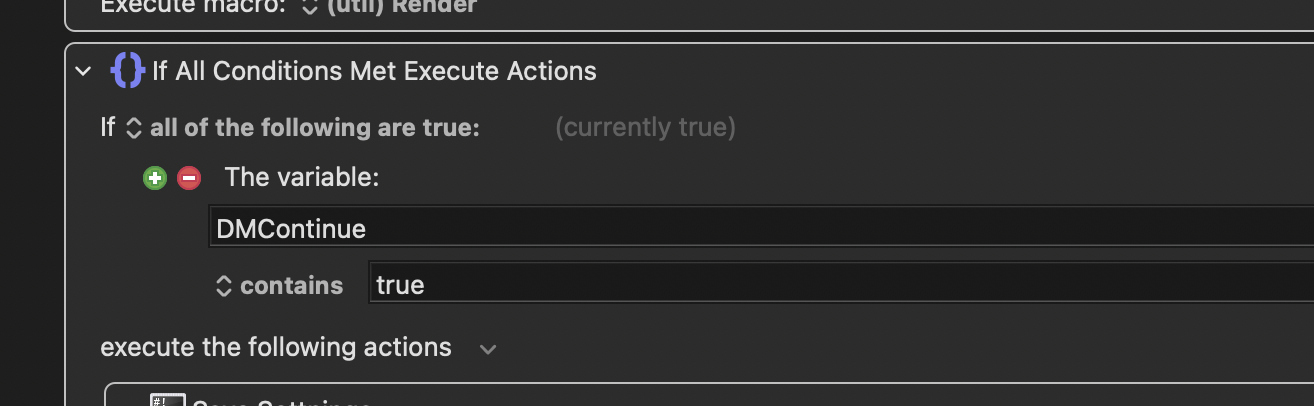
While prompt is displayed there're two ways to close it: by `confirming`, which means saving a variables to Keyboard Maestro or by `cancelling` and just closing a window.
|
||
|
||
In order to make sure that following actions won't be activated, just use `if statement` and check if a variable called `DMContinue` is set to `true`, like so:
|
||
|
||
|
||
|
||
## Summary
|
||
In order to generate a new prompt you need to:
|
||
- create a configuration JSON
|
||
- add `inputs` (for type: prompt) and `list` (for type: list)
|
||
- trigger a macro called `(util) Render` with `Execute a Macro` action.
|
||
|
||
|
||
## Known issues
|
||
- ~~Clicking on list item doesn't trigger an action~~
|
||
- ~~Select input default value does not work~~
|
||
- ~~There is no simple way to manage `DMSettings` (only for `Predefined Macros`)~~
|
||
|